3D printing
*Material
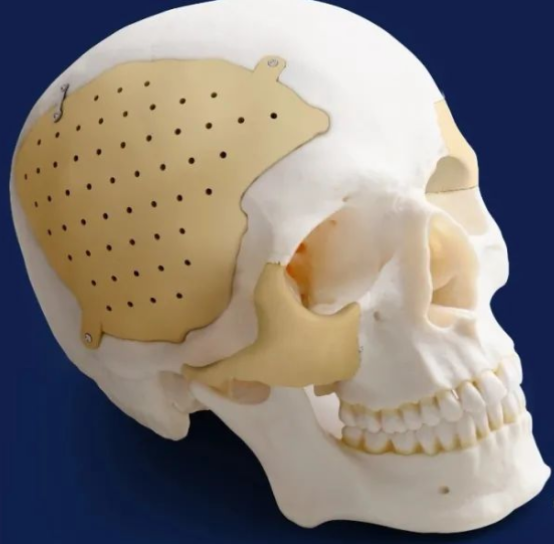
poly(ether-ether-ketone) has excellent mechanical and heat
resistance properties, and is widely used in aerospace,
automotive, medical equipment and other fields. 3D printing
technology can make this material into parts with complex
shapes, such as turbine blades, engine components, and more. In
addition, new aerospace materials such as carbon fiber
composites are difficult to process with conventional
technologies, but 3D printing can greatly shorten the production
process by enabling the overall molding of complex parts.
*Technology
Associate Professor Zhang Hao, Academician Li Jinghong of the
Department of Chemistry of Tsinghua University, Associate
Professor Lin Linhan and Professor Sun Hongbo of the Department of
Precision Instruments jointly developed a new method of 3D
printing of nanomaterials, referred to as 3D Pin, which realizes
the nanoscale 3D printing of a variety of inorganic nanomaterials
by introducing photosensitive nitrogen bin small molecules, with a
high proportion of inorganic components in the structure, and
excellent mechanical properties and tunable optical properties.
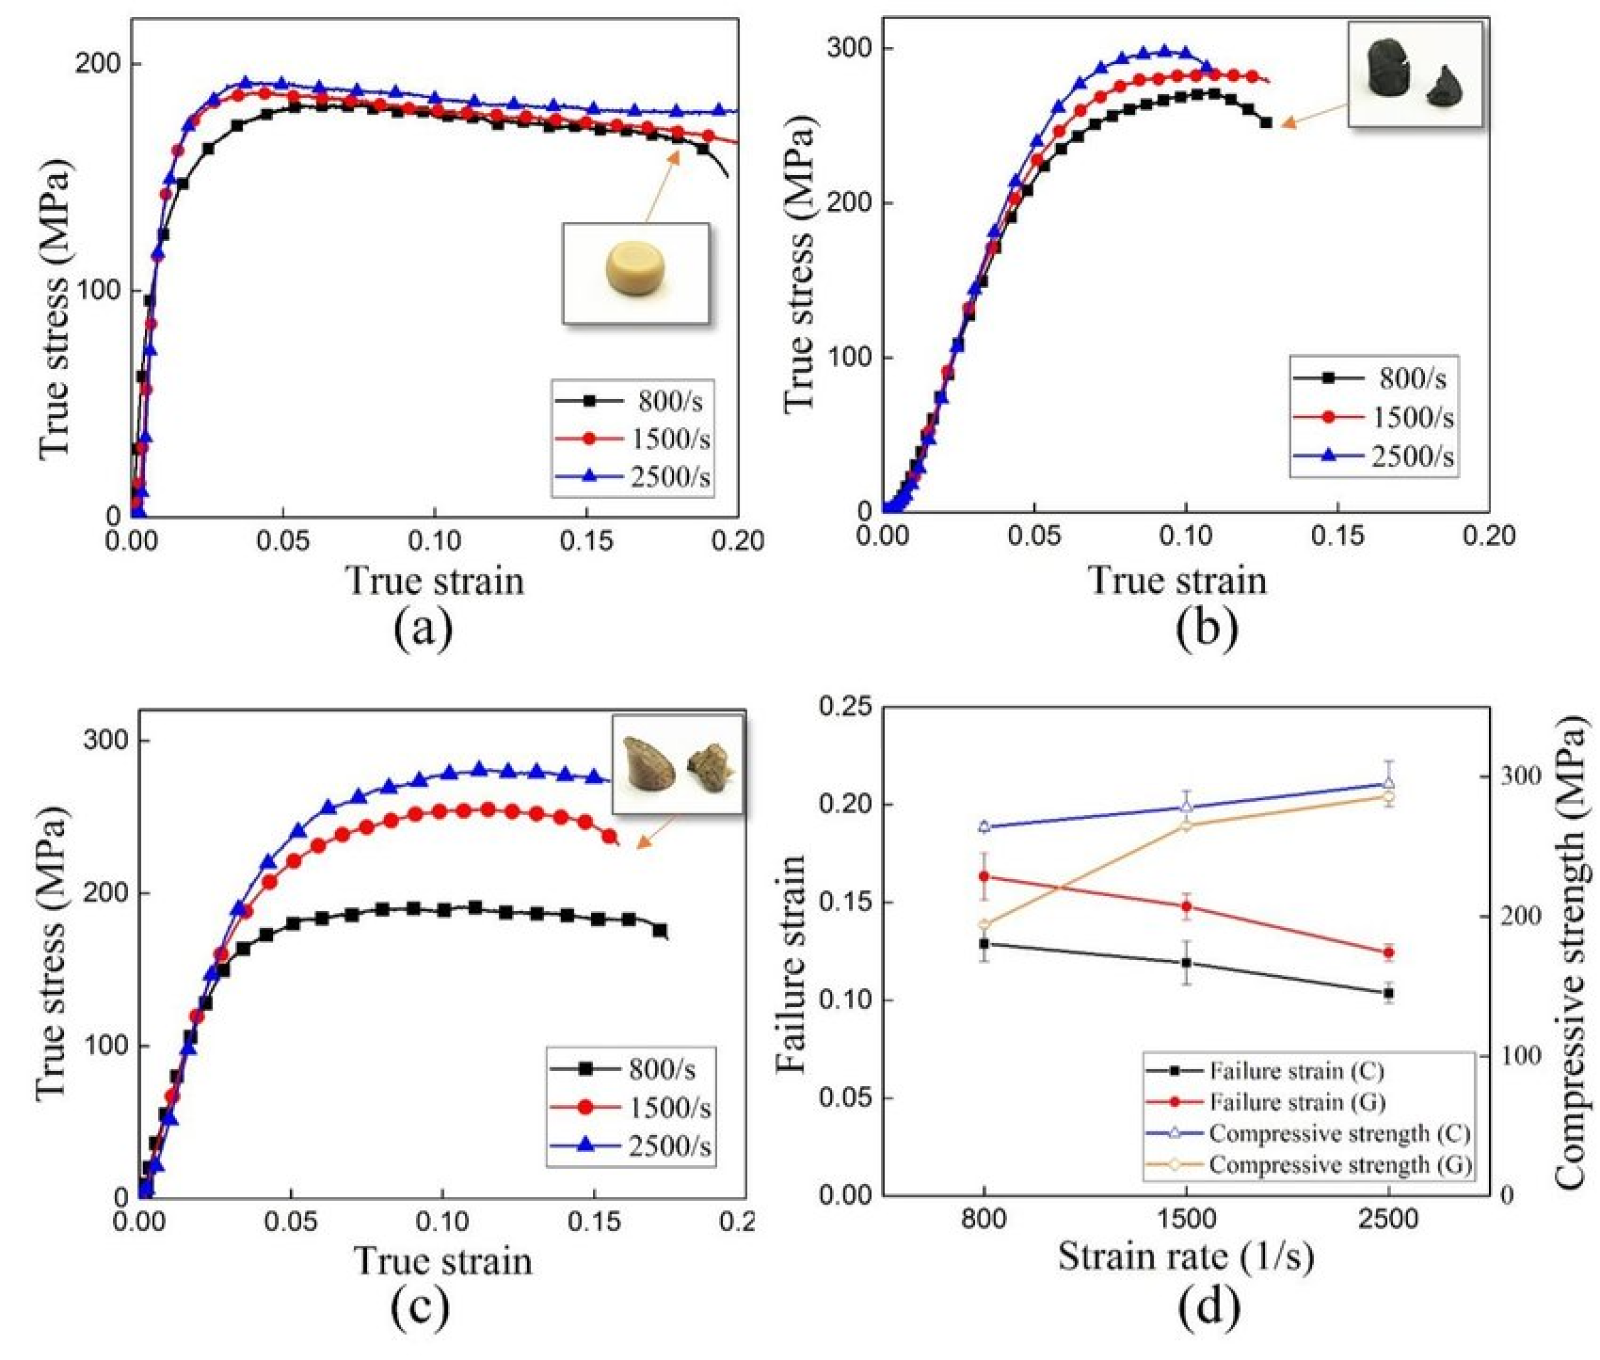
Force curve
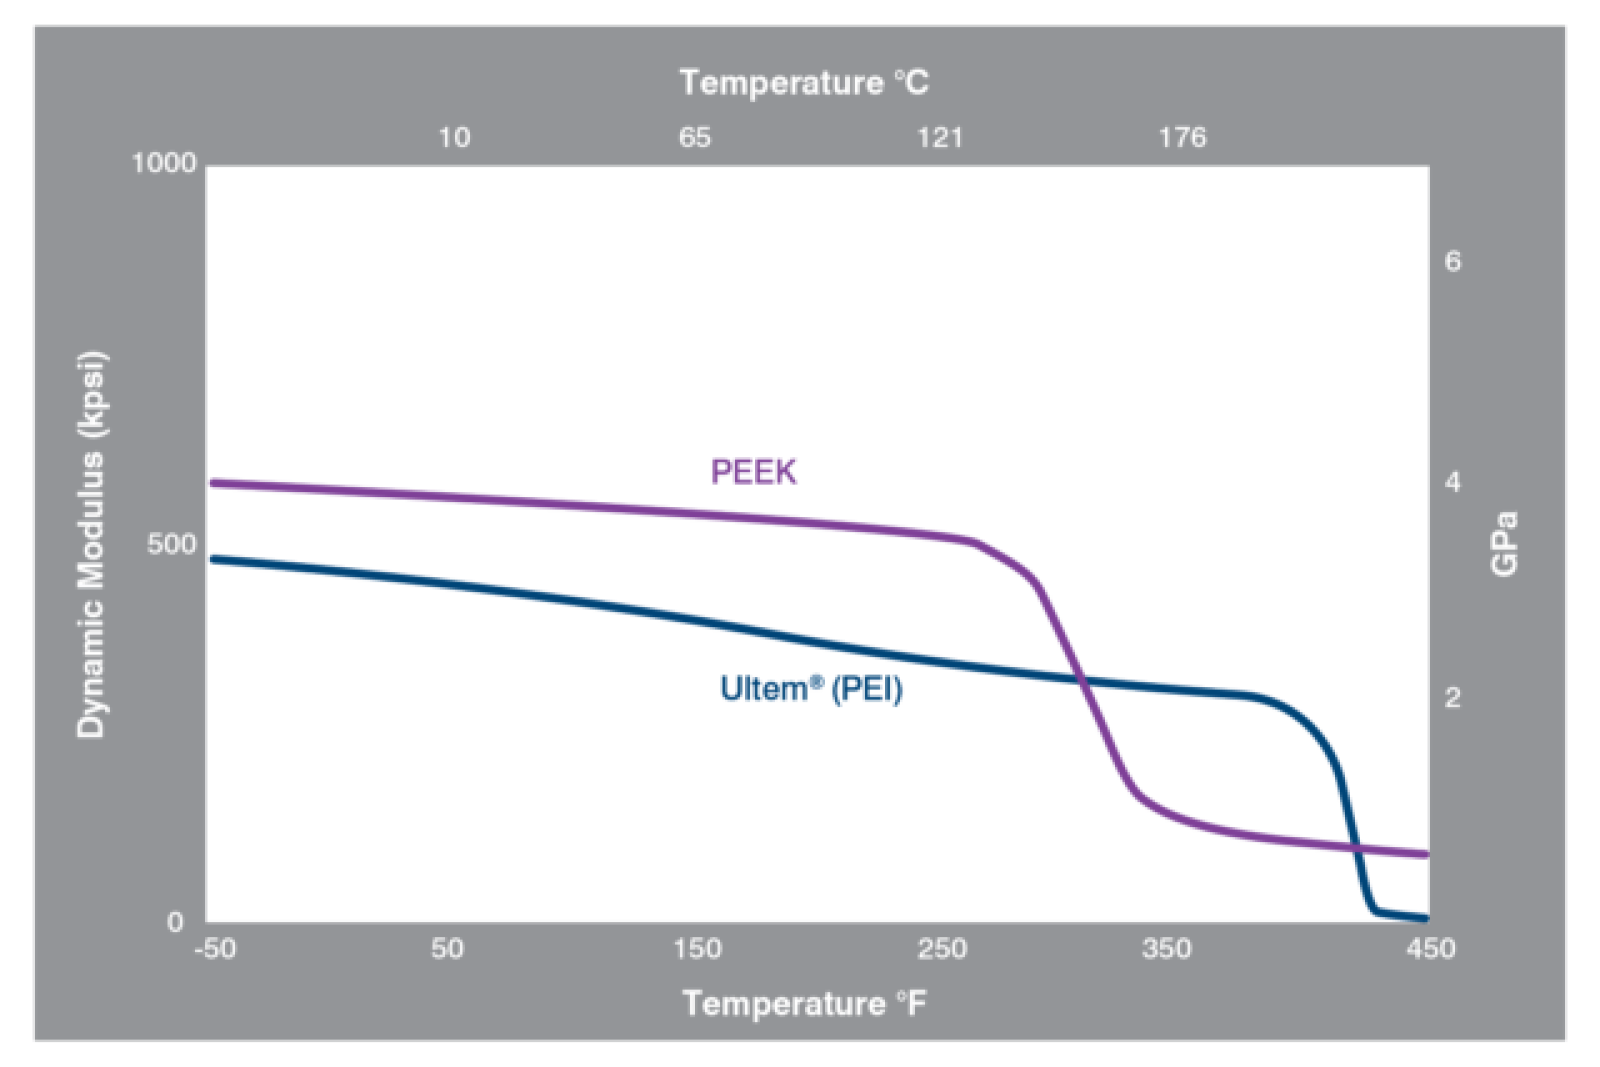
Temperature resistance curve
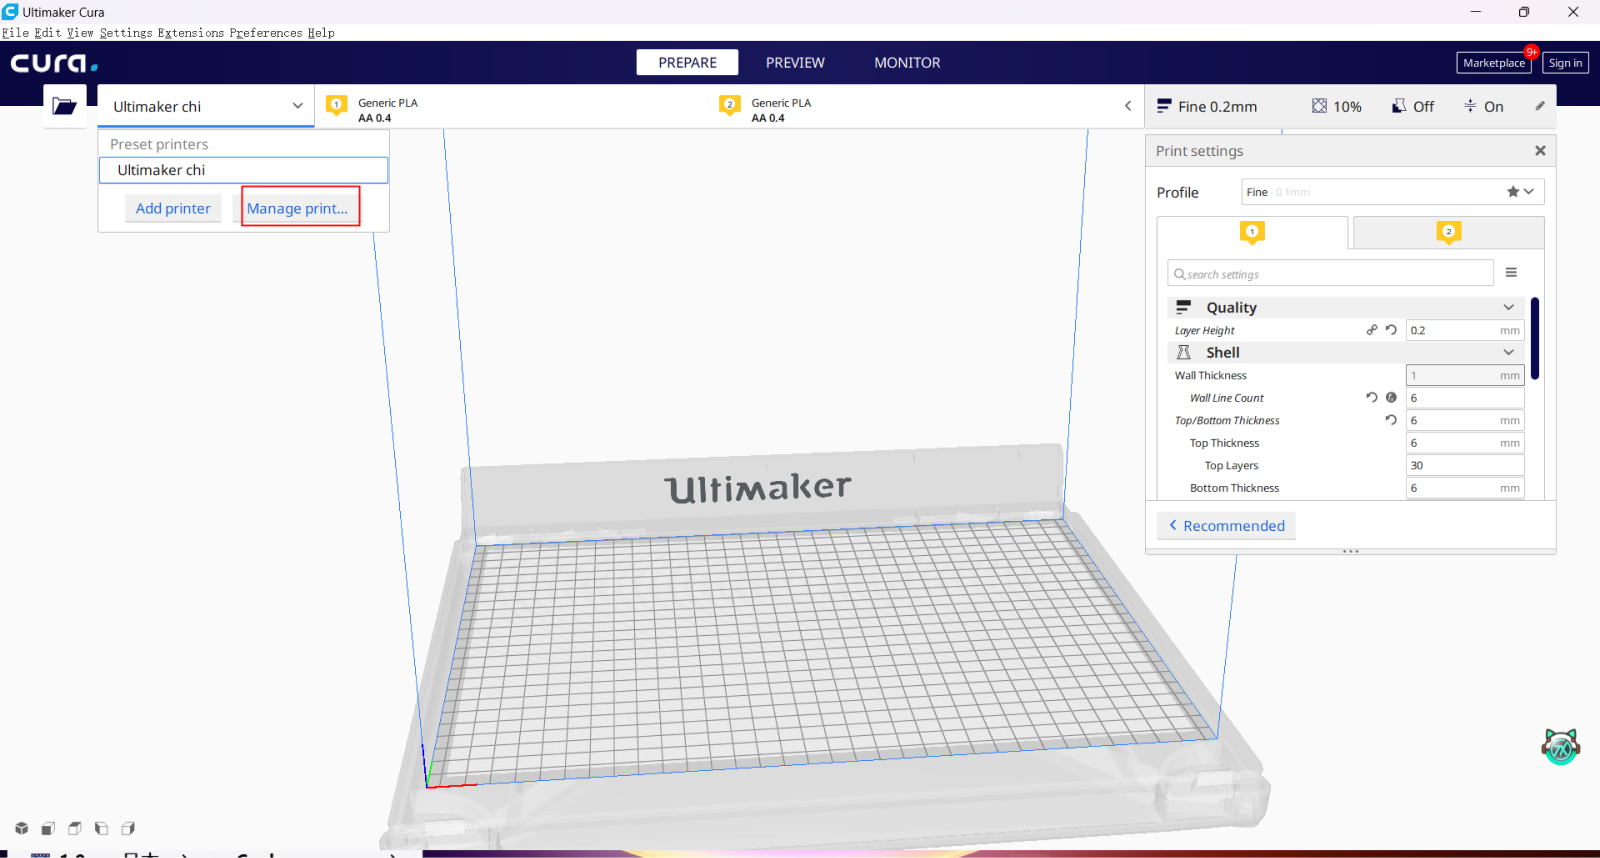
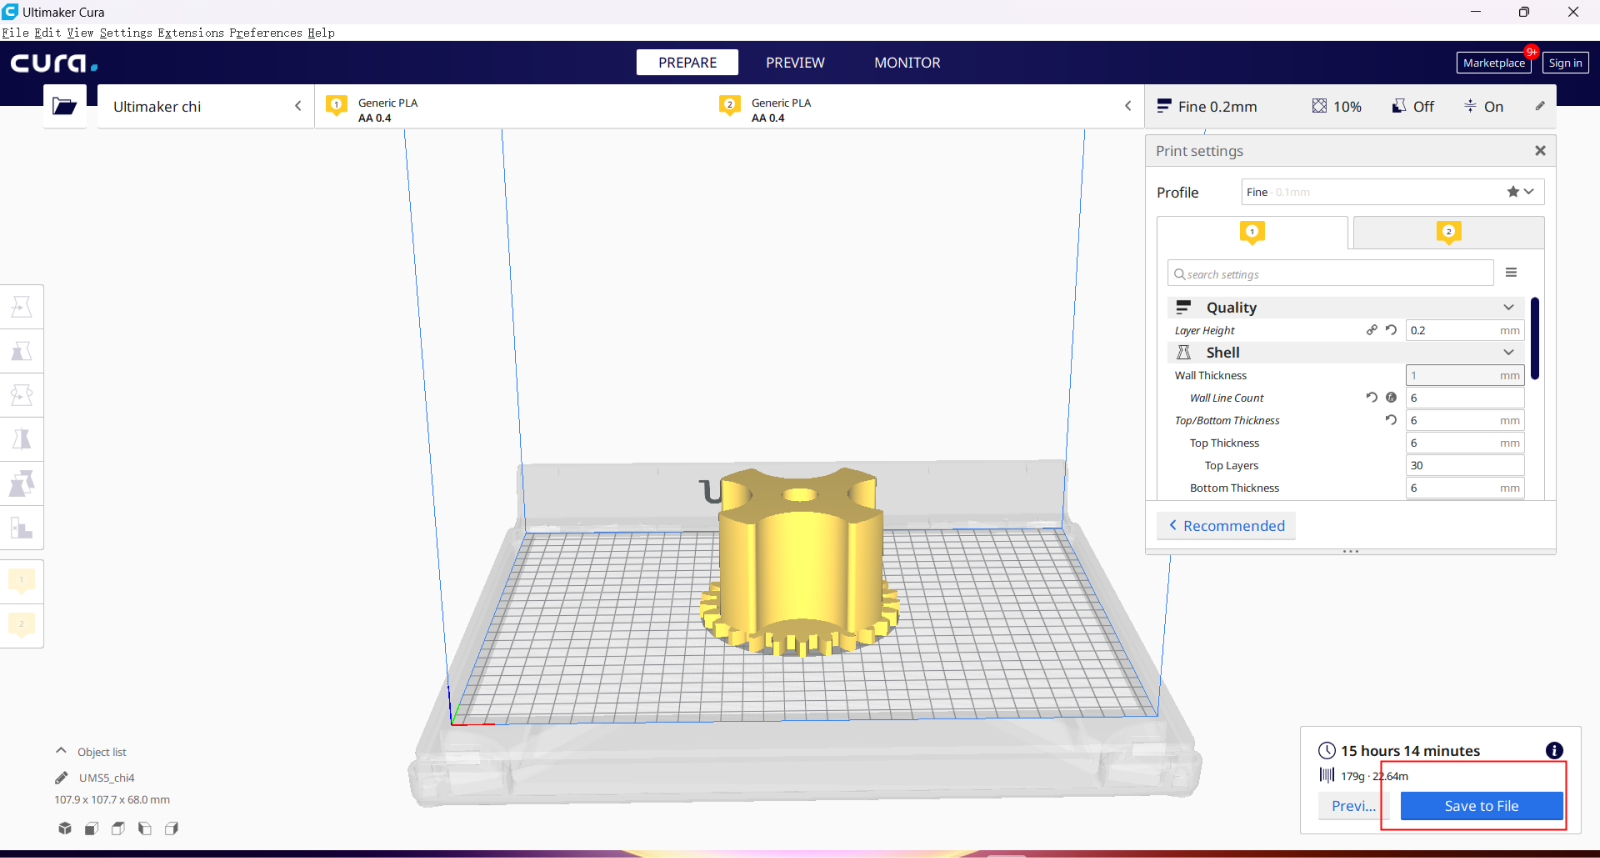
Use slice software to setting parameter
1.Use
Cura
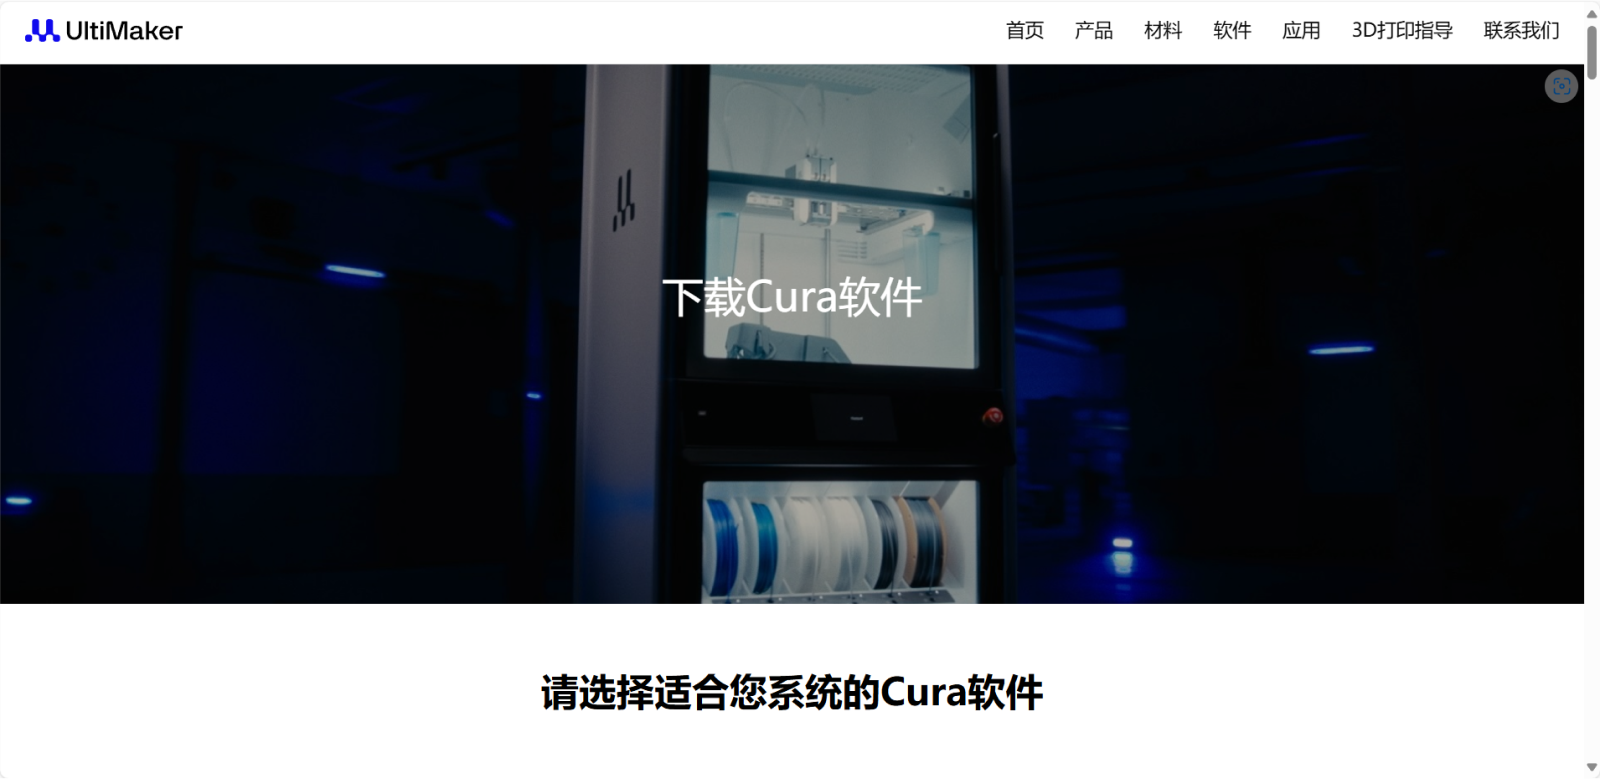
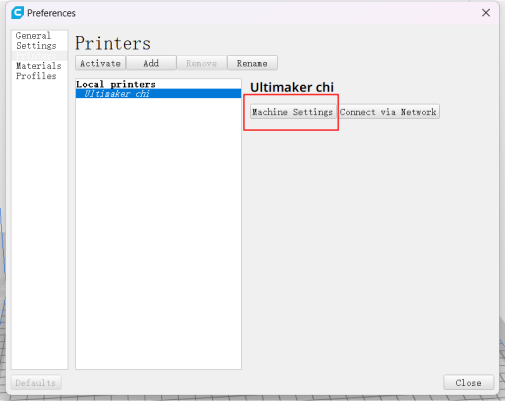
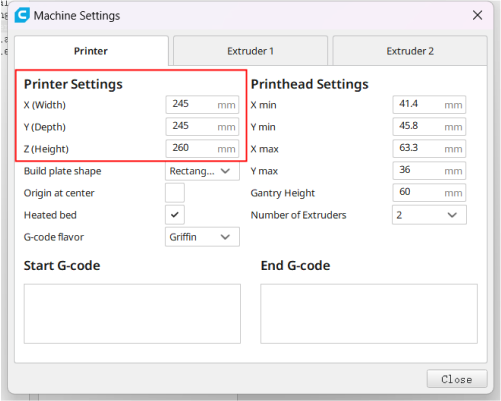
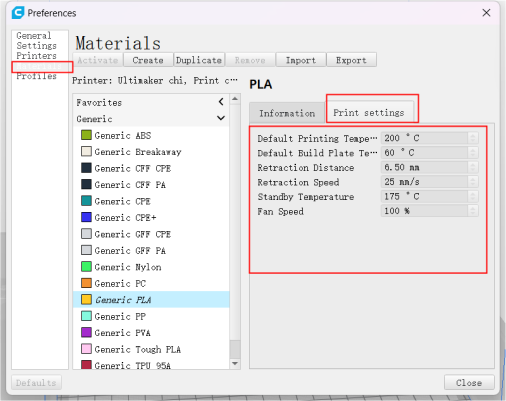
2.Setting 3d printer parameters
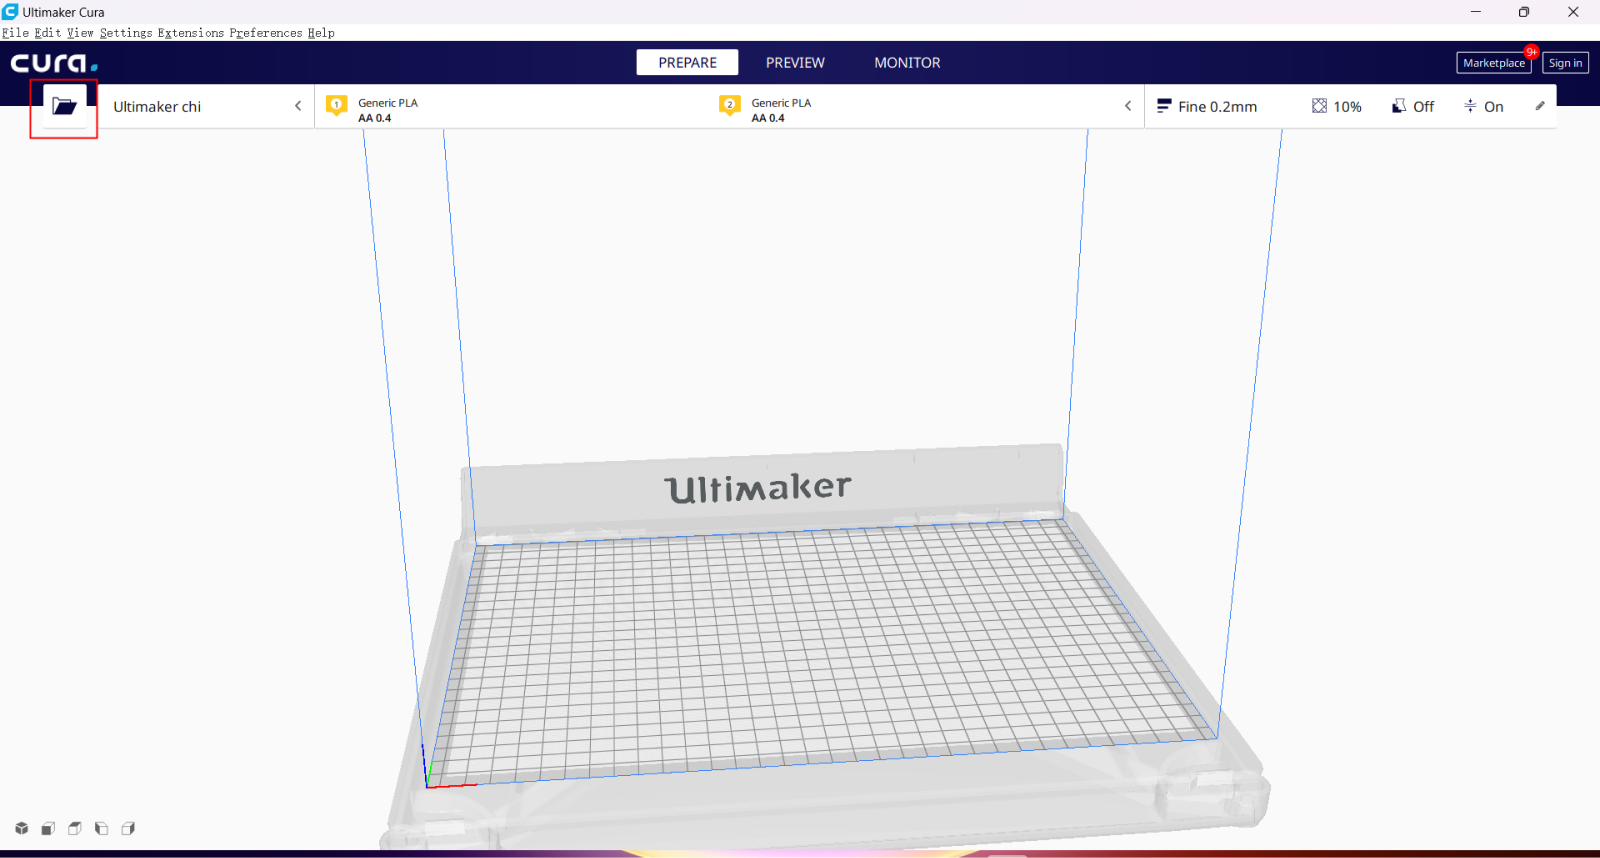
3.Click on the red box area to import 3D model files, such as.obj files
4.Click on the red box area to Rotate the 3d print so that it lies flat
on a horizontal plane
on a horizontal plane

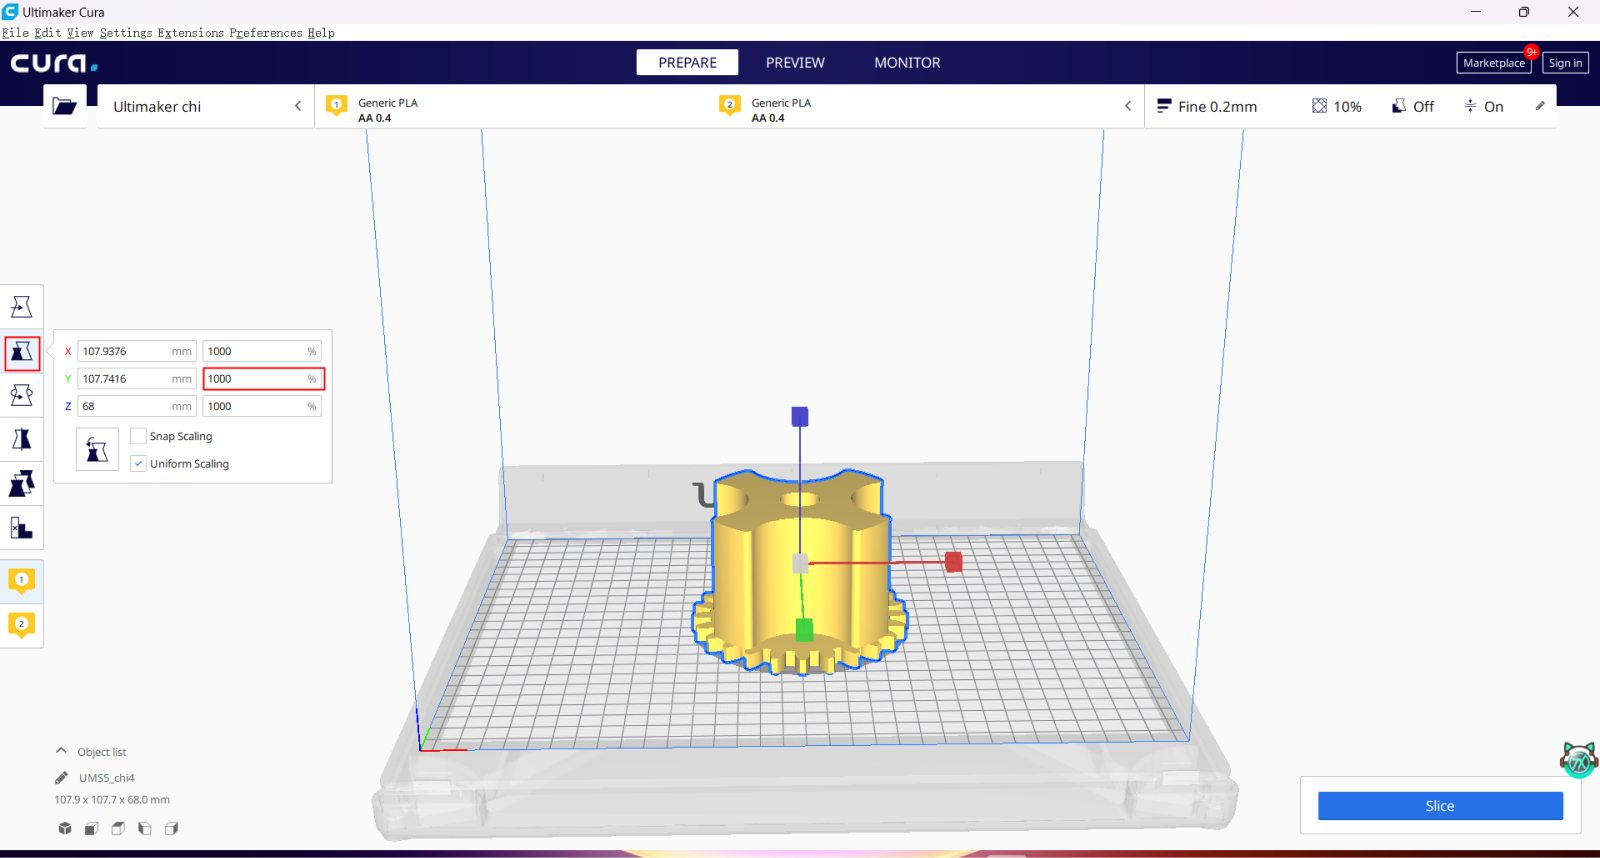
5.Click on the red boxed area to enlarge the 3d print after rotating it
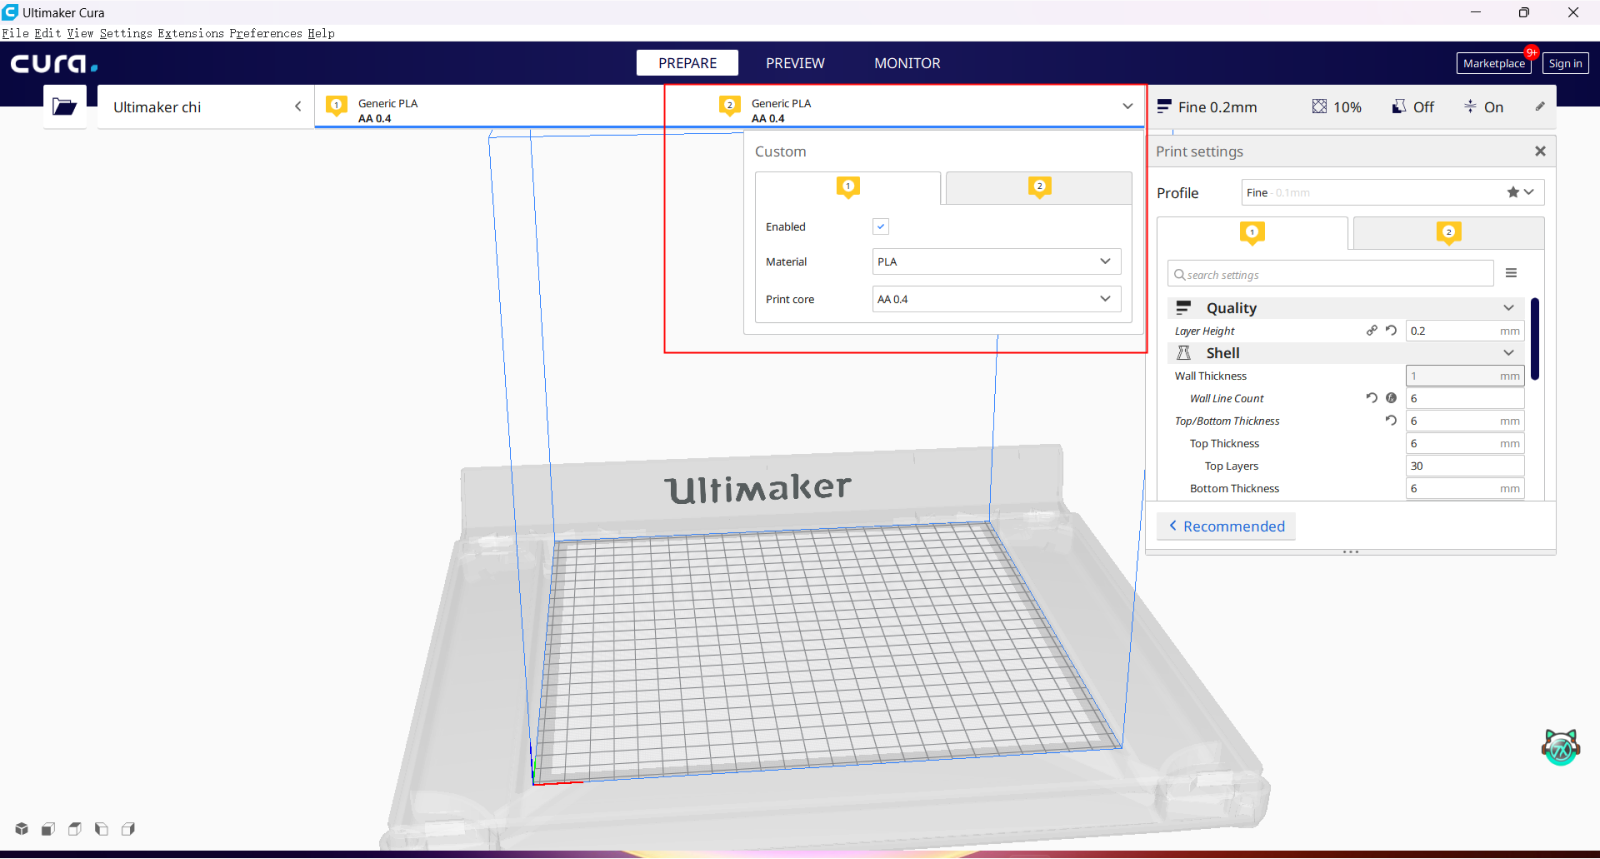
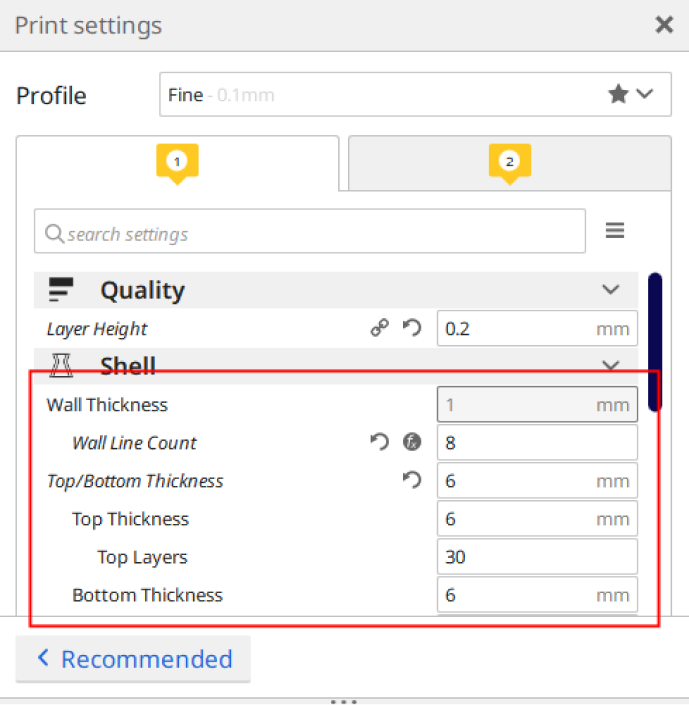
6.Click on the red box and adjust the print parameters in the green box
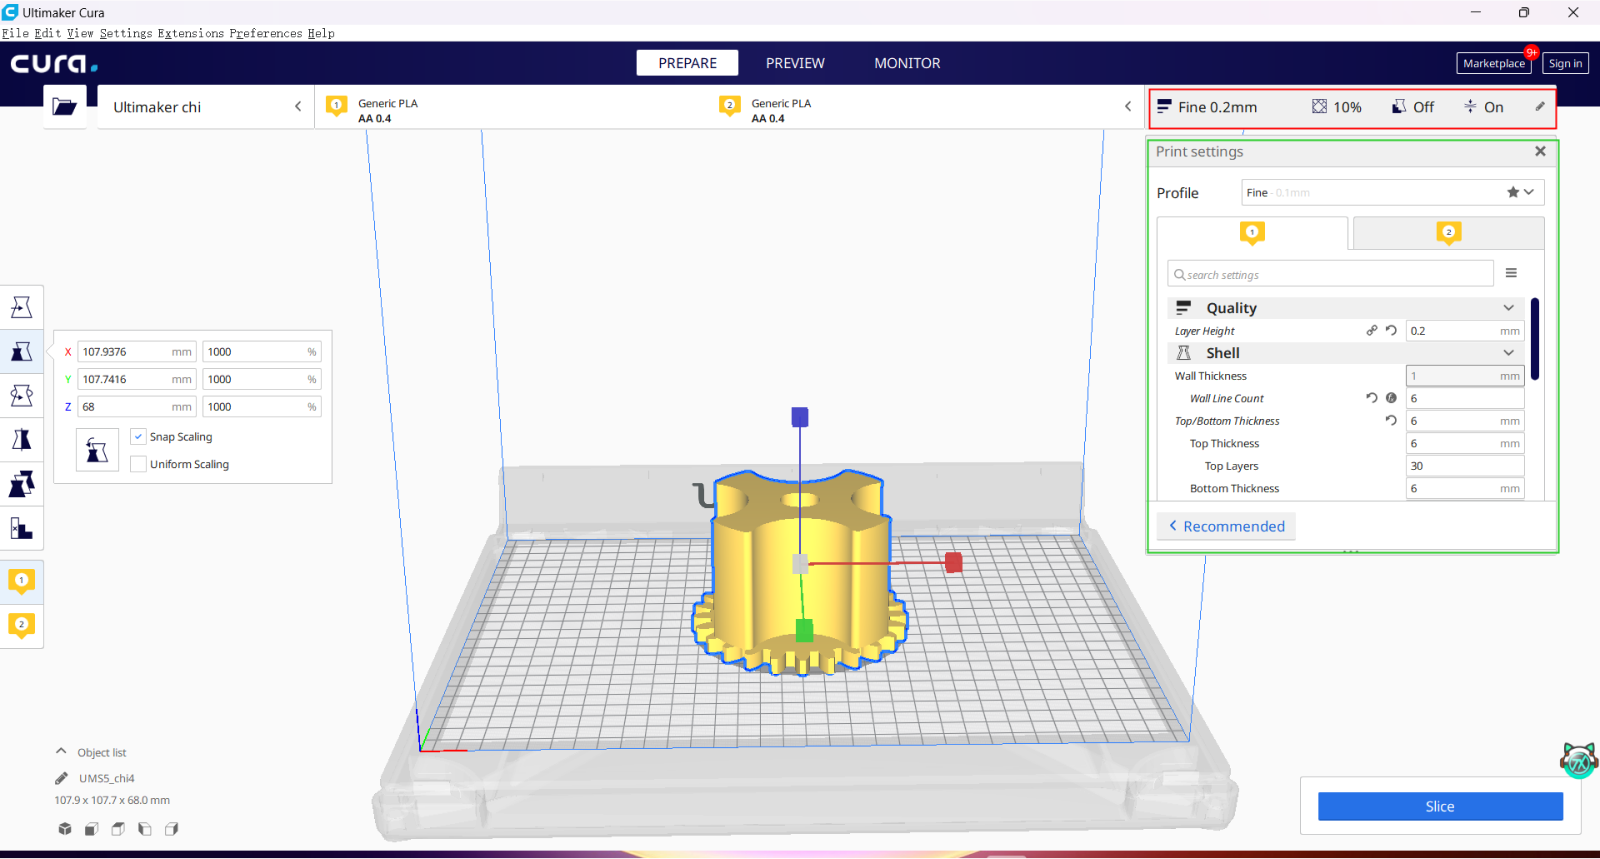
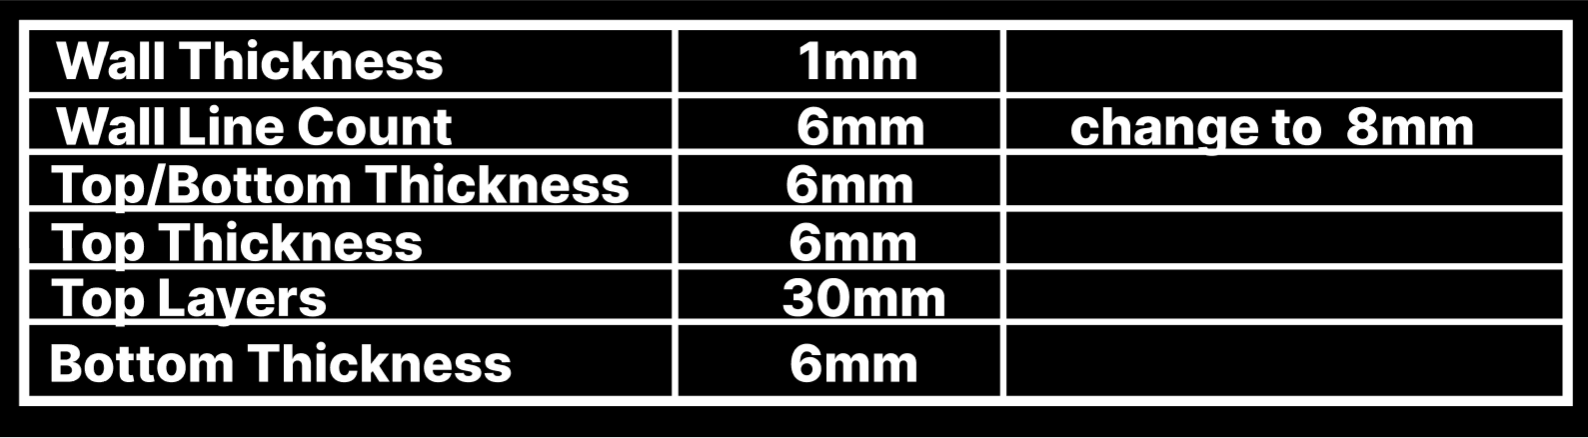
7.Since there are some problems with the wall thickness during printing,
but we can't adjust the wall thickness parameter, we can change the
wall thickness status by adjusting the wall line count parameter.
but we can't adjust the wall thickness parameter, we can change the
wall thickness status by adjusting the wall line count parameter.
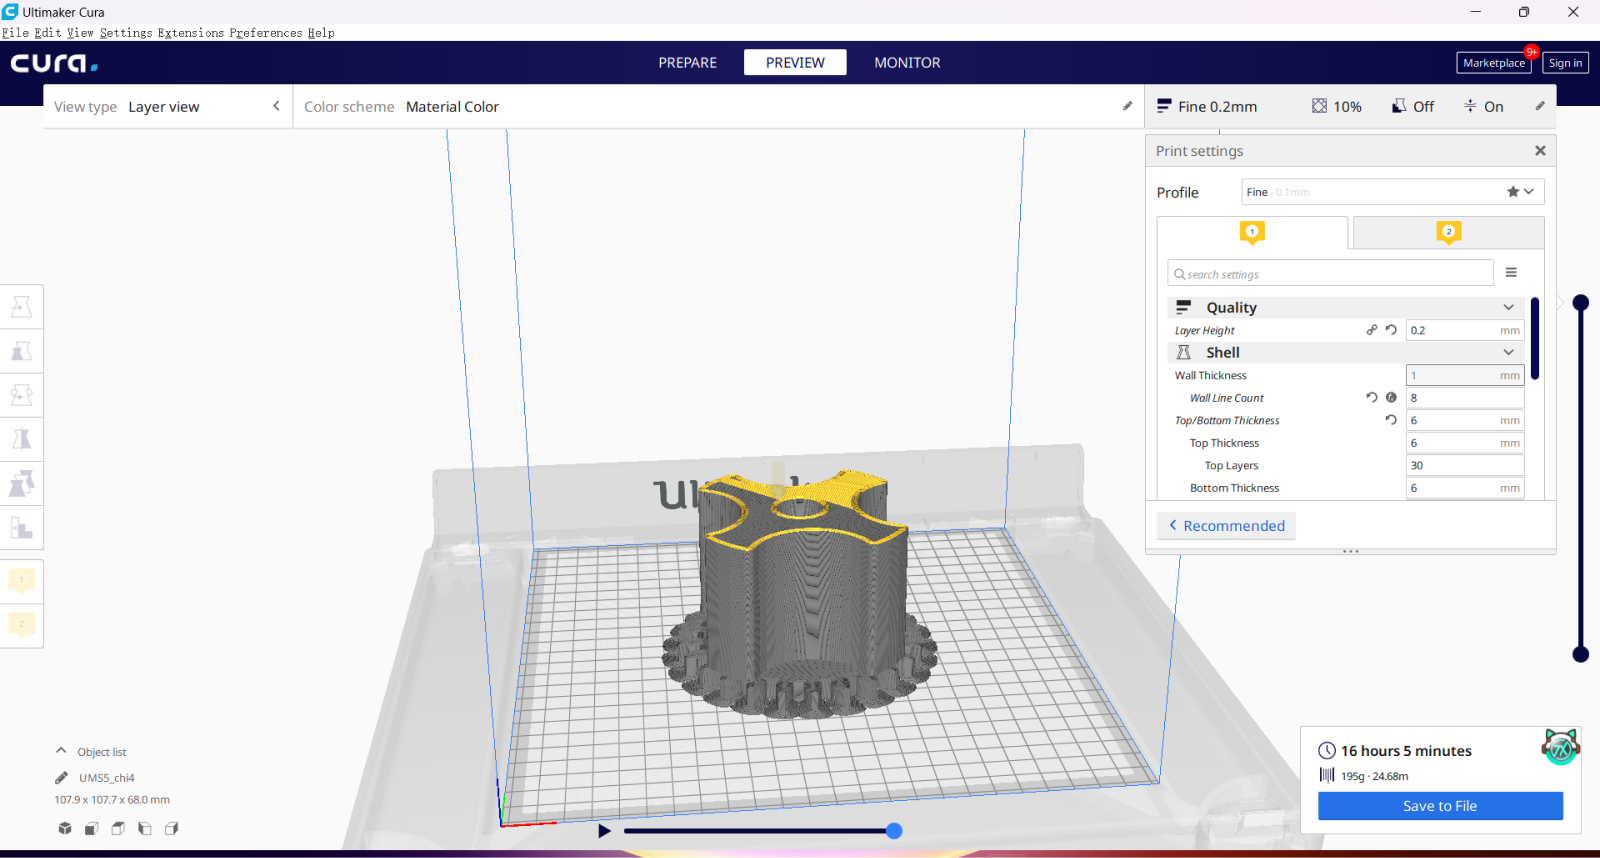
8.Preview
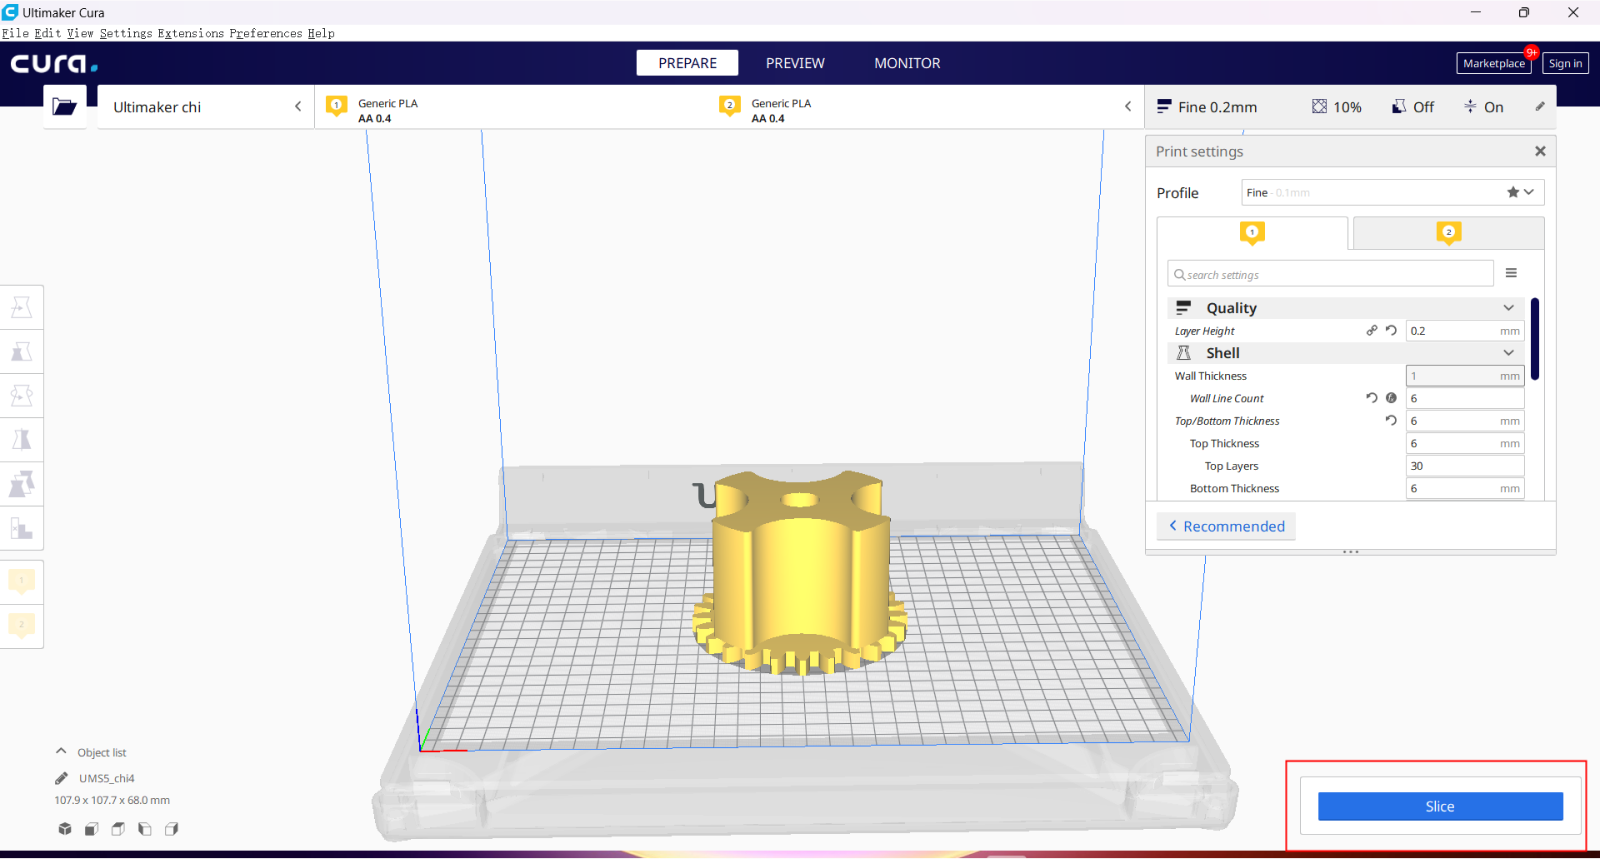
9.Click on the red boxed area to slice
10.Just click on the red boxed area to save the .gcode format
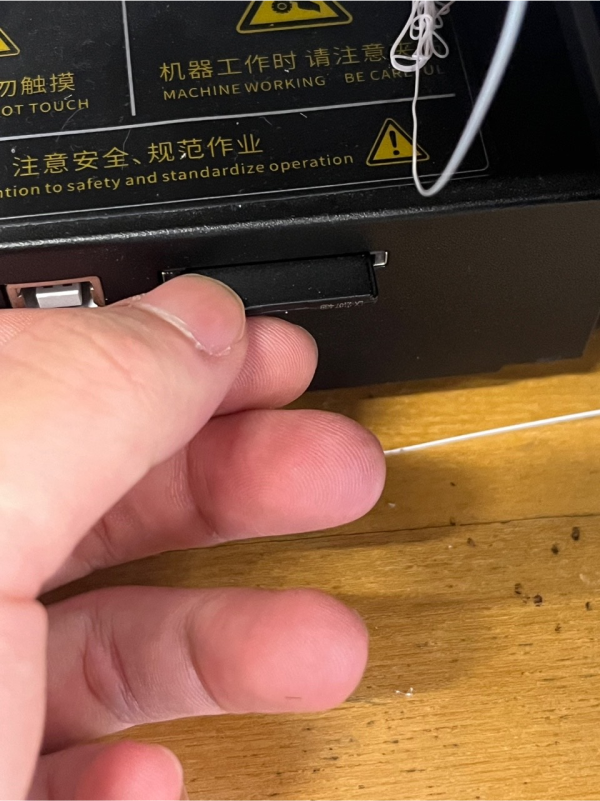
12.Insert the USB card into the printer card slot
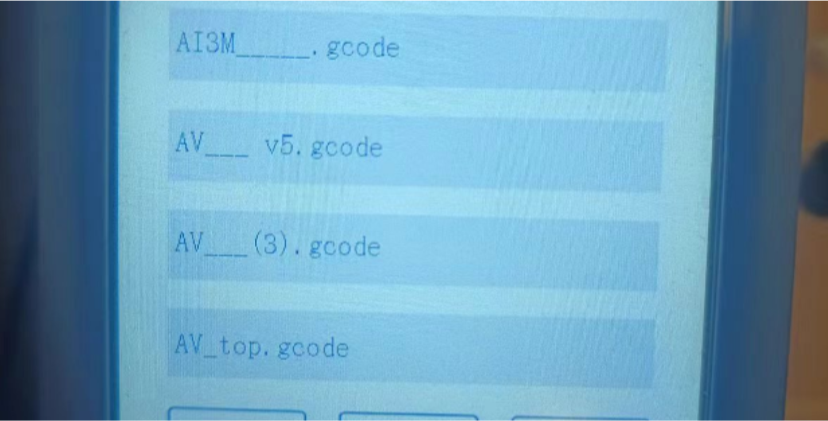
11.Check and adjust printer settings

13.Select the file you just saved and start printing
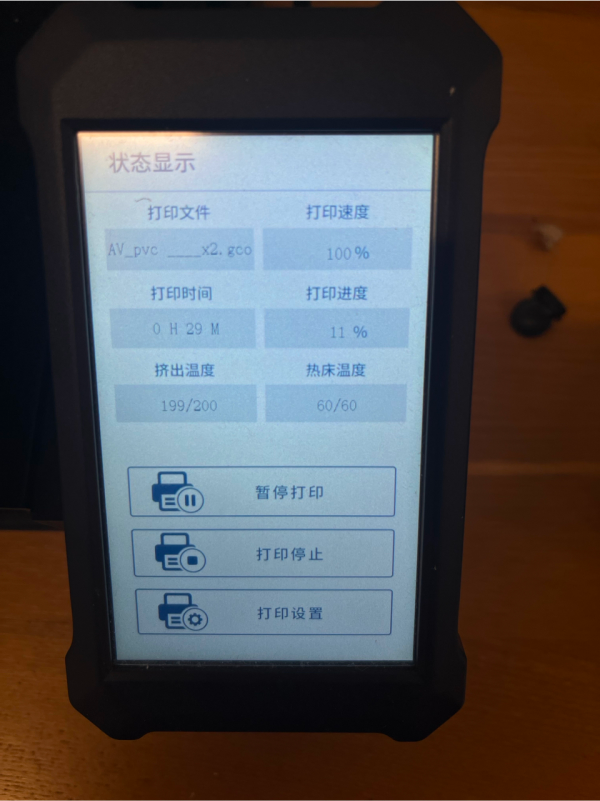
Use 3D printer to manufacture it

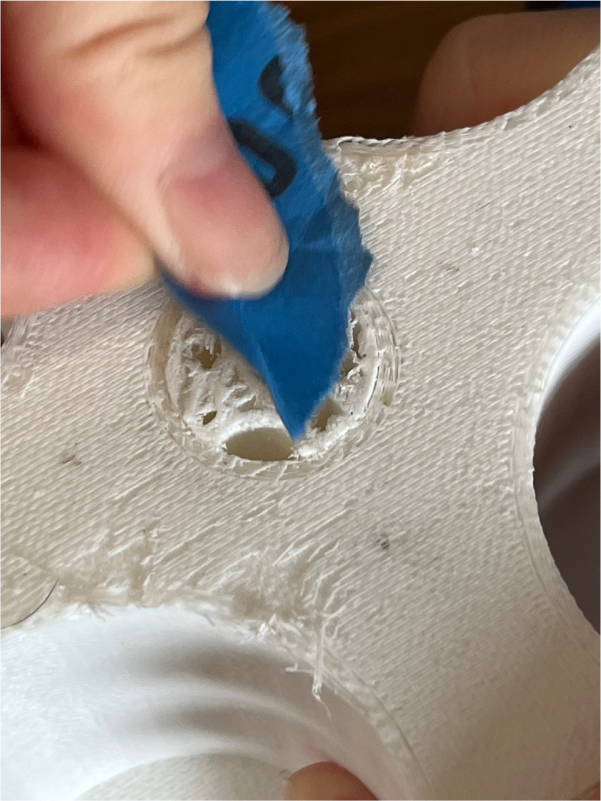
Postprocess the surface
Remove the excess with a pencil sharpener and sandpaper.
Read gcode
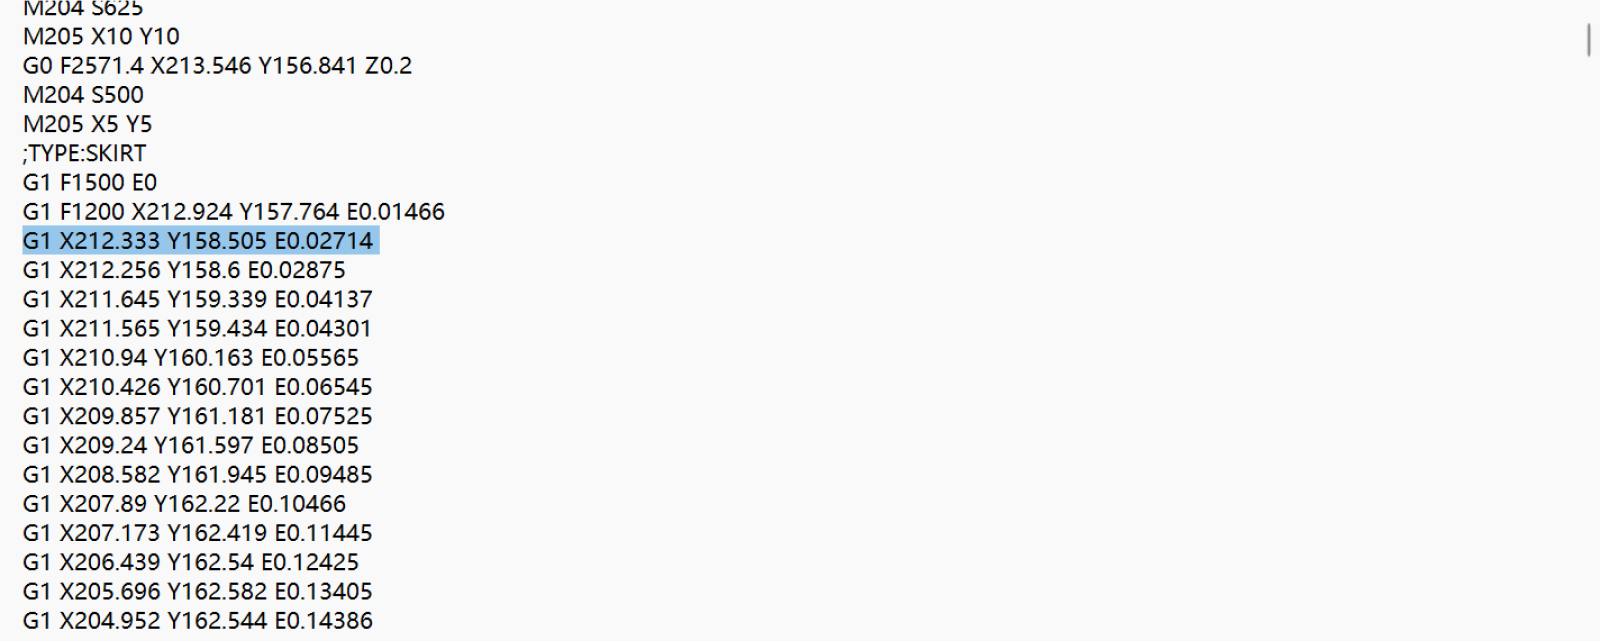
g1 x212.333 y158.505 e0.02714
It means:
G1:
This is a linear interpolation instruction, which means that the control
machine will move along a straight line to the target position at a set speed,
and will perform machining, such as extruding material (3D printing) or making
cuts, as it moves.
X212.333:
The X-coordinate of the target position is 212.333 millimeters
(or other units, depending on your machine settings).
Y158.505:
The Y-coordinate of the target position is 158.505 mm (or other units).
E0.02714:
E usually stands for Extruder and indicates that the extruder needs
to extrude 0.02714 mm of material (or other units) during the move to the target
position.
To summarize:
This G-code instruction instructs your machine to move in a straight line to
the coordinates (X=212.333, Y=158.505) and to extrude 0.02714 mm of material
in the process.
Z refers to the real-time height at which the workpiece is
printed. At the same height, the nozzle moves in the X and Y
directions to create a layer. The preview image and G-code
simulation below show a layer with a height of 0.2 to 0.4.
Preview of the first layer of effects:
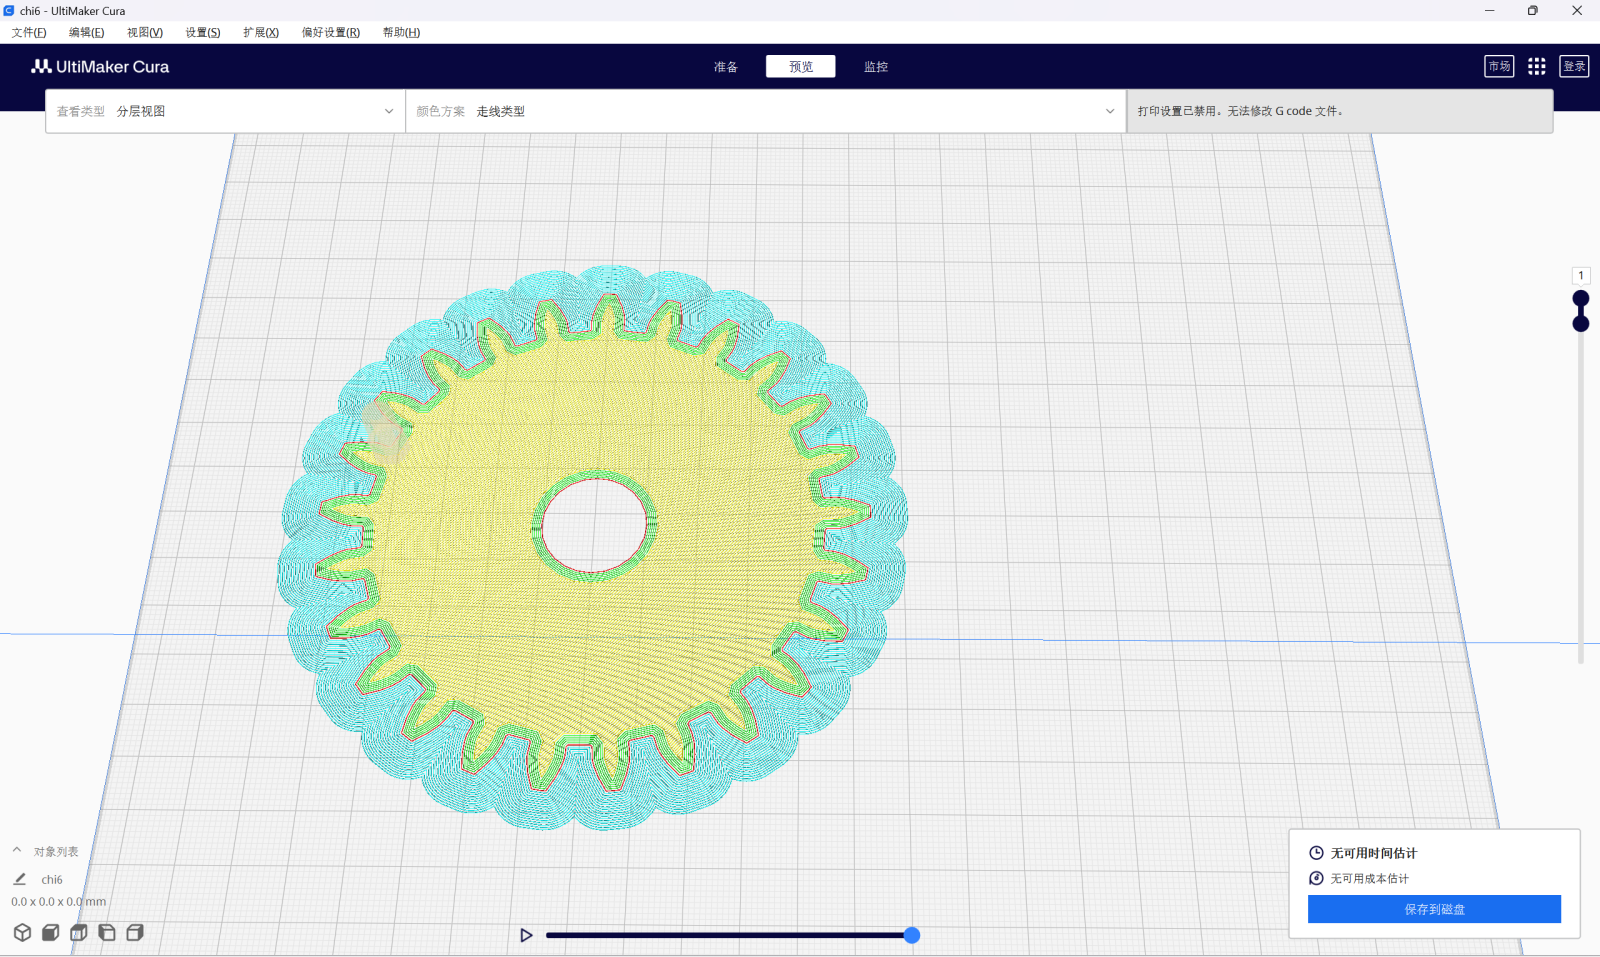
G-code simulation for first layer:
